On entering the kitchen, the first impression is taken by the backsplash and the floors. The tiles in the area must be consistent with the design of the kitchen.
The best time to tile a kitchen is after the installation of all appliances in a kitchen. A kitchen looks modular and appealing with the right selection of tiles.
The Backsplash, Countertops, and floors can be tiled with the same methods easily.
TOOLS REQUIRED:-
- A Trowel
- Cement or Adhesive
- Pencil and Measuring tape
- Screwdriver
- A Cloth
- A Shovel
FOLLOW THE EASY GUIDE ON HOW YOU CAN TILE A KITCHEN BELO
SELECTING A TILE
- Choose the tile according to the contrast of a Kitchen wall and other units.
- Tiles came up with different sizes and designs.
- The type of the tiles varies depending on the area of fitting. Different tiles are used for the backsplash and the floors.
CLEAN THE SPACE
- Cleaning the space is the main step of every job. Where there is a Cleaning, there is better performance.
- Pick up all the appliances and essentials from the Shelf to work more comfortably and smoothly. Also, take the extra things from the floor.
- Cover the countertop with some hard stuff to make it protected from any damage.
TAKE MEASUREMENTS
- Measure the length and height of the backsplash and floor. Note down the calculations.
- Next, measure the tile’s size and take a rough idea of how many tiles are required.
CUT THE ELECTRIC SUPPLY
- To make sure you are safe while working with the spots of extension, electric plugs; turn the electric supply off.
- Shut down the electrical appliances from the countertop and shift them to the other place.
PREPARE THE MORTAR
- The mortar is prepared by mixing the Sand and the Cement. Later On, the water is added into the mixture using a shovel.
- Prepare a thin texture of the mortar. If it becomes too thin, add some cement to the mixture.
- You can also buy quick mortar from the market.
FIND THE CENTER
- While tiling the backsplash, starting from the middle is always a good idea.
- Pick the center by measuring the length of the wall.
- Beginning the procedure from the center will make the work easy and sequential.
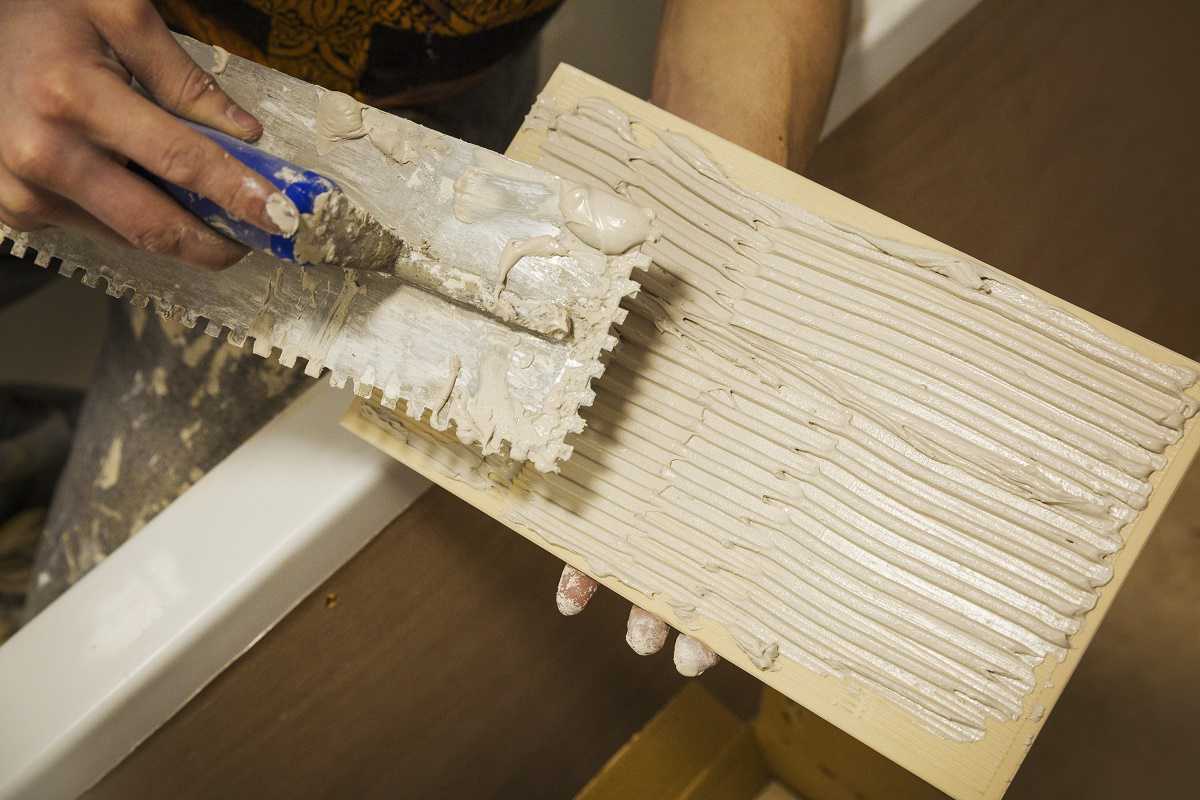
APPLY THE MORTAR
- Spread a thin, consistent layer of mortar over the wall of the backsplash and floor with the help of a trowel.
- Make sure that you are applying the mortar in one direction for consistent results.
PLACE THE TILE
- Place tiles parallel to the ground and perpendicular to the walls in case of backsplash and vice versa when tiling a floor.
- Slightly press the tiles so that they could stick with the adhesive quickly.
- Settle the tiles in a proper place by striking the back of the trowel over it.
CUTTING TILES
- To fit tiles in small portions of the walls, cut tiles with the help of a cutter and stick the required piece.
- Also, around the electrical plugs, extensions, and window corners, the tiles need trimming.
PYRAMID STRUCTURE
- While tiling the backsplash, follow the Pyramid structure to place the tiles.
- It will enhance and faster the working pace. Repeat the procedure.
ADD GROUT
- The last step is to add the grout to the tiles for leaving the best finish. Wipe off the dust and extra material from the tiles.
- A portion of cement and water can be added to the grout for extra benefit. Apply the grout all over the surface.
- Let the grout dry for at least 3 hours and clean it with a cloth or a Sponge.
Read Also – HOW TO FIT KITCHEN UNITS?